This week’s Do Something That Scares You is my report on our fireplace rehaul.
This is where I tell you that I am not going to do a tutorial on how to remodel your own fireplace. But I am going to tell you where to find the tutorials I used, how it went down for us, and what not to do so you can learn from our mistakes…
This whole idea started with me HATING the very visible cords from our TV which is hung above the fireplace. My OCD nature could not stand those cords haunting me all day, every day. I put IKEA cabinets up while nesting with my last baby and that at least gave us some more storage and hid the cable box, but it wasnt exactly looking like the built-ins I was going for. Plus, the cords going from the TV to the cable box were still there.
I studied tutorials for recovering a fireplace easily 3 of the 3 1/2 years we’ve lived here. It took me that long to get my guts up to finally bite the bullet, but I did my best to combine my favorite tutorials into what we needed and wanted: Young House Love and Thrifty Decor Chick. At first, I wanted to hire someone, but when I had a guy come to give a bid, he seemed to not be understanding my vision and I was worried it would both be so expensive and in the end not what I wanted. My mom and I had already purchased some tile when she visited (two months ago… oops!), so I thought I’d start with that. And in usual fashion, I began with some demo as that’s the easiest way to get yourself started–no going back once things are destructed!
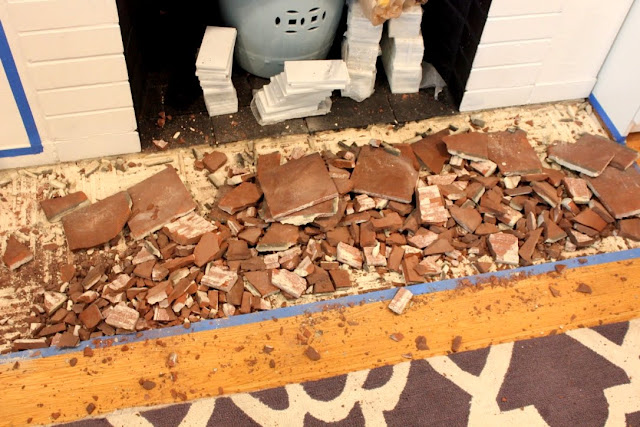
Except, I barely made a dent to the terra cotta tile, no matter how hard I tried. Brad finally busted out the tile for me using our neighbor’s sledgehammer. (Brad, you are so very strong. And handsome.)
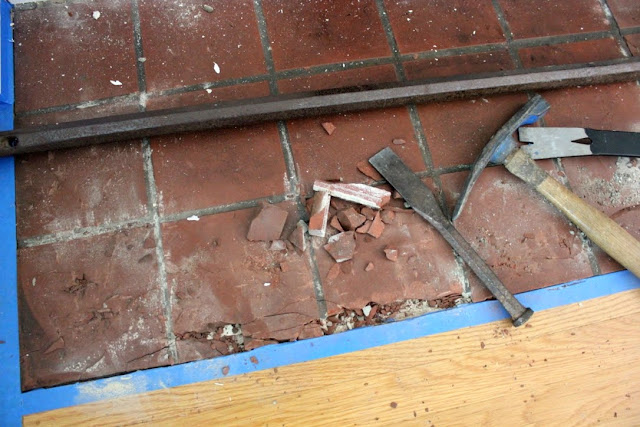 |
| This is as far as I got on my own. Time to bring out the big guns: Brad with a sledgehammer. |
Before I started the tile, I re-painted the edges of the inside of the fireplace, in case it showed alongside the marble once it was up. I spent the next week working on tiling. This involved me googling a lot of tutorials, renting a wet saw, cutting the marble tile (it was SCARY!), laying everything out, making intermittent trips to Home Depot with three children to get more tile…, finally tiling, and then procrastinating grouting for a few days.
I also planned out how we’d recover the surround: I drew some plans, measured, re-measured, and made a list of exactly what we needed from Home Depot and wrote up a list in the order in which we needed to buy the supplies.
But quickly, here are some mistakes I made in the tiling process: 1) Mixing too-thin thinset for the tile. (Oh, the irony!) On the vertical parts surrounding the fireplace, the tile was slipping off and really difficult to keep in place; 2) I also mixed too-thin grout the first time. I had to go back and buy more after my first box was clearly too watery; 3) Sponging off too much grout. A week later, I had to grout over everything after it was all “done,” which took me an additional two hours.)
The following Friday night, my friend watched the kids and we went on a two hour date night to Home Depot. We got all. the. wood. And it was raining. My husband is a really good sport but I think we were both wondering what on earth I’d gotten us into.
That Saturday, Brad tried to cut the wood with a free-saw (this did not work well), I grouted (for the first time), then we got paint color (that supposedly matched to our IKEA cabinets on the side of the fireplace, but I’m not feeling like they match perfectly). We begged our neighbors and borrowed ten of their nicest tools. Brad cut some more and I started screwing and nailing things in well into the night, practically spraining my hand in the process. I had to be creative about where to drill holes into the mantle and sides so that I could string the cords through to the side, where the built in would be. Also, I had to drill into brick and mortar. There was sweating involved, both figuratively and literally.
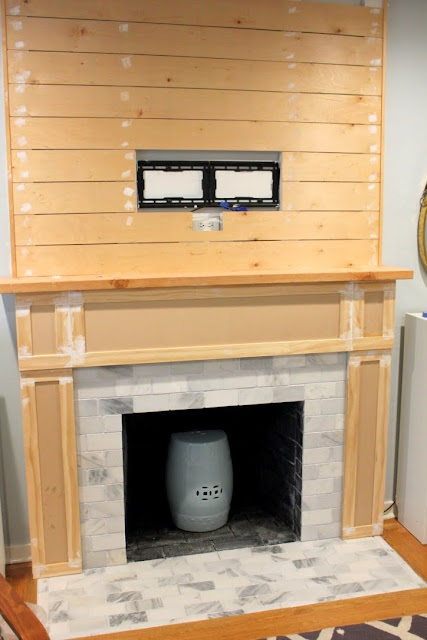
After a LOT of trial and error that I will not bore you with, by Sunday morning it looked like this:
I painted the background and the 2X4s white and then Brad used the nail gun to put them in, because that thing is nuts. I was convinced someone was going to get a nail to the skull. We also nailed in the MDF boards for the front. (My biggest mistake from this process: I wish I had used 1X2s (or whatever you’d call them) instead of 2X4s for above the fireplace, behind the planks/shiplap. The reason is that even though the planks are level and the 2X4s behind them are painted, you can still see them through the planks in the finished product, and it somehow makes the planks look warped/unleveled. That bugs me, but not enough to do anything about it right now. Or possibly ever. But at the time, it seemed like a logical way to raise the planks enough for the cords to run through. Hindsight is 20/20!)
By Monday night, we finished the trim. Here’s the progress picture:
The rest of that week, I caulked but made a BIG mistake and didn’t wipe off the excess right away with a wet towel (I blame my hungry children). I also had to re-grout that darn tile. So one day I spent six hours alone just re-grouting and carefully scraping off all the excess caulk (and it was a lot). I then sanded the wood, primed it, then painted it on Friday and Saturday.
After the paint was set, I screwed in the IKEA cabinets (these also had to be jigsawed at the bottom to fit better against the baseboards). I repainted the entire inside of the fireplace with fireproof paint.
Side-note: We used to keep a garden stool in there because there is a chute in the back bottom of the pit, and children are curious. As of now, since removing the stool there haven’t been problems. While I don’t love the garden stool there, it might soon find it’s way back there once Baby D starts crawling. Any suggestions on what to put there instead, besides plants? (Because they will die. I promise you.)
 |
| Almost there! |
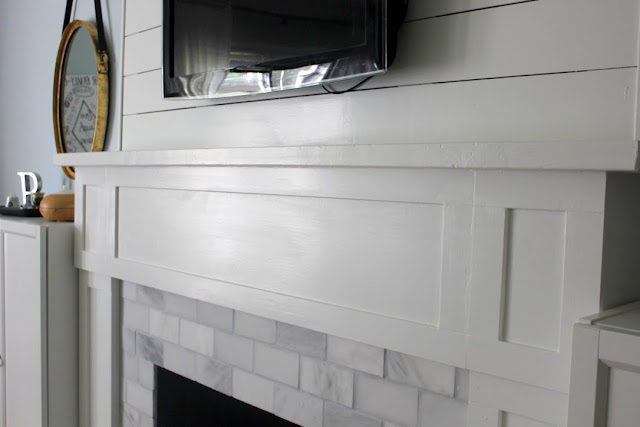 |
| I’ve since sanded and repainted that part right over the fireplace, which didn’t take long–probably a half hour. |
This past week, I purchased and painted crown molding, had it installed by a great handyman who did a great job with our wonky, unleveled ceiling, and I put down our new rug purchased from Zulily. I also painted the ceiling. Because, why not? (Actually, it was because we had our defunct track lighting removed and got real lighting (yay!) and my ceiling paint I bought to patch things up totally did not match. In the end, I’m so so glad I had to repaint the whole ceiling, because otherwise the ceiling would have looked khaki compared to the molding.)
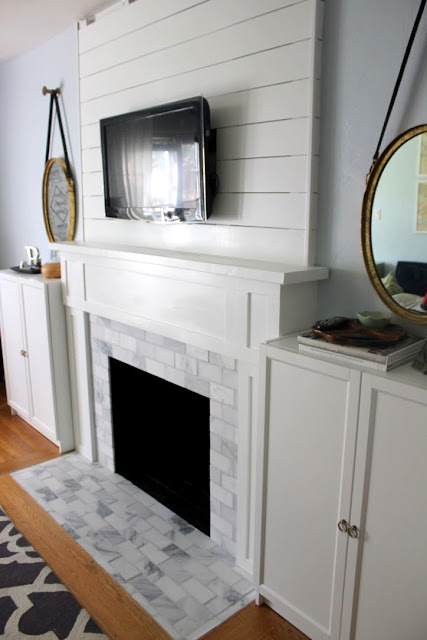
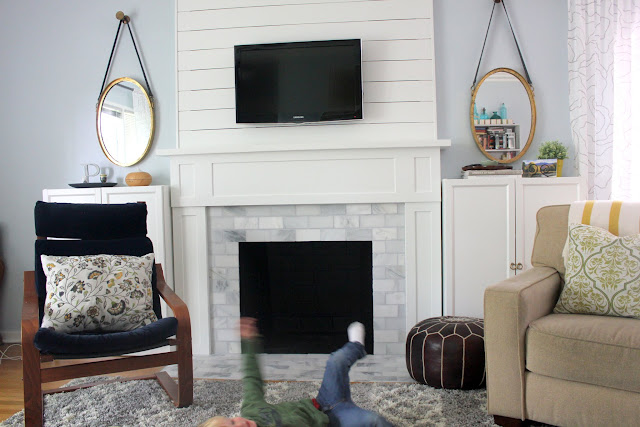
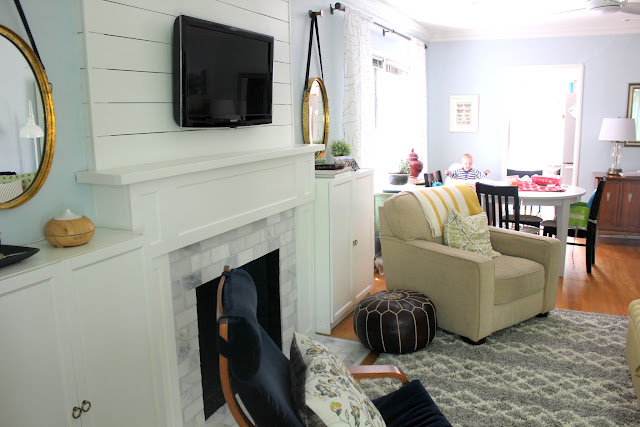
I’ve touched up the paint on the walls, but I still need to patch the small nail holes and touch up more paint on the crown molding, but let’s just say it’s done. Here are the vanity photos, with some kids sneaking in:








It looks beautiful Monica! Want to come do mine next? 😉
Wow! Looks so great. You did such a wonderful job! Congrats!
I don't know if you'd really like that, even if I did live next door! I can handle the imperfections because I know I didn't pay for them, if you know what I mean… Thanks for the compliment!
Thank you, dear friend!
Your house looks like it came straight out of HGTV!
Ha! That is high praise! Right now, it's completely trashed as I lay on the couch ignoring the mess. You should see it now!